In this post you will learn how to customize User’s Profile and add new fields/properties/columns (FirstName, LastName and EmailID) in a brand new table with ASP.NET Identity System.
Note: You should read this post instead, I found below walkthrough will not work on ASP.NET Identity 2. I will re-work on this post soon. In this post you will learn how to customize User’s Profile and add some more fields like FirstName, LastName, EmailID etc with ASP.NET Identity System. In my last post I listed some of the great new features introduced with Identity system .
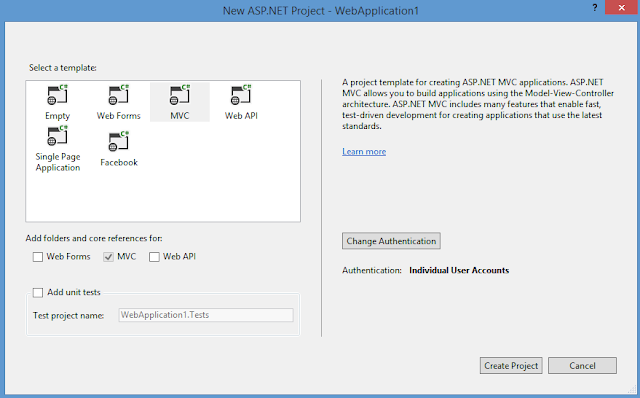
In this post you will learn about a very new enhancement in ASP.NET Framework technologies (MVC, Web Forms, Web Pages, Web API and SignalR) known as ‘ASP.NET Identity System’ with the release of Visual Studio 2013. This enhancement well defines the meaning of ‘One ASP.NET’, because this can be used with all ASP.NET Framework technologies more easily than before.
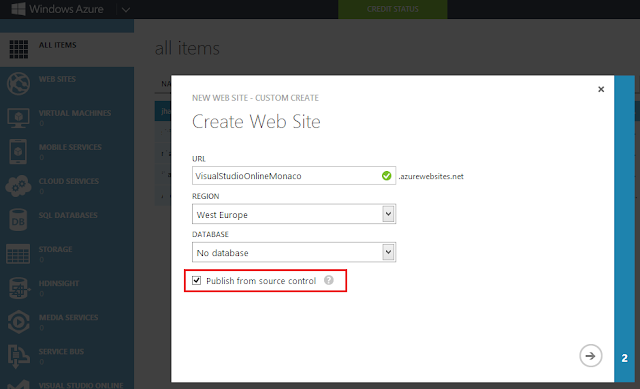
In the part 1 of this series you learned how to edit compiled websites using Visual Studio Online Monaco Editor. Now in this part you will learn how to edit source code of website. Read my previous post or at least first paragraph of that post.
In this post series I will show you how we can take advantage of Visual Studio Online “Monaco” to edit codes (HTML, CSS, C#, JavaScript etc) in the browser out of the box.
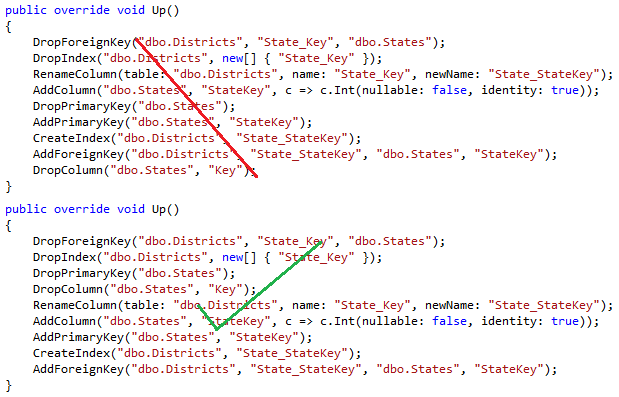
This post addresses the error that we see when executing Update-Database command inside Package Manager Console. I am going to talk about two continuous error appears and fix is very simple, just read this blog.
In this blog post you will learn a new feature ‘Custom Code First Conventions’ introduced with Entity Framework 6. This is 'Code First' only improvement. EF 6 comes with number of cool new features and improvements, so I decided to write blog posts and cover some of the new features.
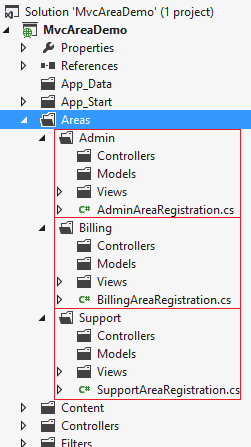
In this post you will learn how to create Area in MVC 5, because creating Area in MVC 4 was quite different. In MVC 5 (Visual Studio 2013), Area option can be found under ‘Add Scaffold’ dialog. In this post, I will take you through step by step to setup and running Area in MVC 5. "Area in MVC 4" is available here.
In this blog let's talk about a really cool tool for MVC developers ‘Route Debugger’. Sometimes a bug in your route can break application because it invokes either an incorrect controller or action. So, do not worry just install this tool in the application and it will make your route debugging easier like never before.
In this article you will learn how to create a Drop Down List in MVC that can display States and its associated Districts in a single Drop Down List. You will learn this step by step.
In this post you will learn what are ‘Named Routes’ and how to use them to generate URLs. I will explain this using problem and then solution approach.
In this post you will learn how to define ‘Route Constraints’ in MVC Application. Route Constraints allow us to apply a regular expression to a URL segment to restrict whether the route will match the request.
In this post you will learn how to use jQuery.tmpl (jQuery Template) JavaScript library in MVC for client side templating. I will take you through few easy steps to setup it and working.
In this video you will learn how to scaffold the CRUD/Controller/DbContext using MvcScaffolding package developed by Scott Hanselman and Steve Sanderson.
In this post you will learn how to use Mustache.js JavaScript library in MVC for client side templating. I will take you through few easy steps to setup it and working.
In this post you will learn how to create or enable client side validation on the custom data annotations. If you go through my last blog, you will learn how to create custom data annotations to enable server side validation, I also recorded a video for this and uploaded on YouTube . This blog will take you further, so go and read or watch video, if you missed.
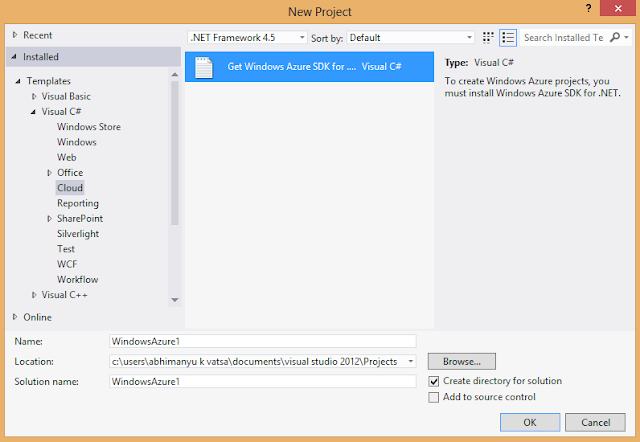
In this post you will learn following things: i) Introduction to BLOB Storage ii) Installing the Azure SDK iii) Creating MVC Application (Web Role) to upload BLOBs (for example, images) and delete BLOBs iv) Publishing to Windows Azure (Storage and Web Role)
In this video will learn how to create custom data annotation in MVC. MVC framework has great extensibility feature and because of this we can create our own customized data annotation attributes.
Note: You should read this post instead, I found below walkthrough will not work on ASP.NET Identity 2. I will re-work on this post soon. In this post you will learn how to customize User’s Profile and add some more fields like FirstName, LastName, EmailID etc with ASP.NET Identity System. In my last post I listed some of the great new features introduced with Identity system .
As you know ASP.NET Core Identity (table structure) is different from what we had earlier in ASP.NET Identity. Actually the identity system which we have today with .NET Core is very mature and continuously evolved be it ASP.NET Membership, ASP.NET Identity 1, ASP.NET Identity 2 and now ASP.NET Core Identity. Recently I had to migrate few application to ASP.NET Core and similar its identity database. Because the table schema is changed, i had to re-think and create migration script which I would like to share with you today. It is very simple and easy, just three step and I had everything ready: STEP 1 : Change name of existing tables STEP 2 : Create ASP.NET Core Identity tables STEP 3 : Migrate data from old tables (ASP.NET Identity) to new tables (ASP.NET Core Identity) Script: https://gist.github.com/itorian/c699e8534b392a6c726ec66c48100072 You should also watch my video, where I demoed migration.
In this blog post I am going to cover some really interesting stuff which is very useful today in web application developments. You will learn how to make jQuery Ajax GET and POST calls to controller methods.