Working with Linear/Radial Gradients and Gradient Vector Transform in XAML Silverlight
Introduction
In
Silverlight, gradients specify a range of position dependent colors used to
fill a region. The colors produced by a gradient are very continuous with
position and produces smooth color transitions.
Silverlight
uses two types of gradients:
(i)
Linear Gradient
A linear gradient is
specified by two points and a color at each point. The color along the line
through those points is calculated using linear interpolation algorithm and
then extended perpendicular to that line. Look at the screenshot of a linear
gradient.

(ii)
Radial Gradient
A radial gradient is
specified as a circle that has one color and a focus that has another color.
Colors are calculated by linear interpolation algorithm based on distance from
the focus. Look at the screenshot of radial gradient.

Steps
to create Linear/Radial Gradients
I'm
going to apply the gradient effect in rectangle's fill (you may choose stroke
or opacity). For this follow the steps:
1. First
choose where to apply the gradient color (fill, stroke or opacity).
2. Now
choose brush type to "Gradient brush".
3. Now
put the gradient stops on slider (minimum 2 gradient stops are default); you
many put many more.
4. Select
each stop (when you select stop, stop color will be black) and change the color
one by one.
5. And
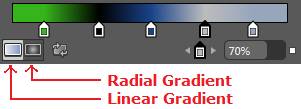
finally you may switch the gradient to Linear or Radial any time.
6. You
can also reverse the gradient stops any time.
7. We
can also change the gradient stop offset by selecting gradient stops one by
one. It will produce an advanced look in your art.

Gradient
Vector Transform
Expression
Blend has a great tool to help you specify a vector for the brush transform
tool. It is located in the blend toolbar. Look at the screenshot to use this
feature in art.


Comments
Post a Comment